Silent Hill Townfall Key Items and Puzzle Solutions
Every lock, safe, and machine that stands in your way in Silent Hill Townfall answers to one of 124 Key Items across all seven maps. Most are story steps you can’t skip, so a stalled puzzle almost always means a code, a setting, or an item you haven’t found yet. The Silent Hill Townfall map of Clara Woods Estate has 32 of them, the longest chain in the game.
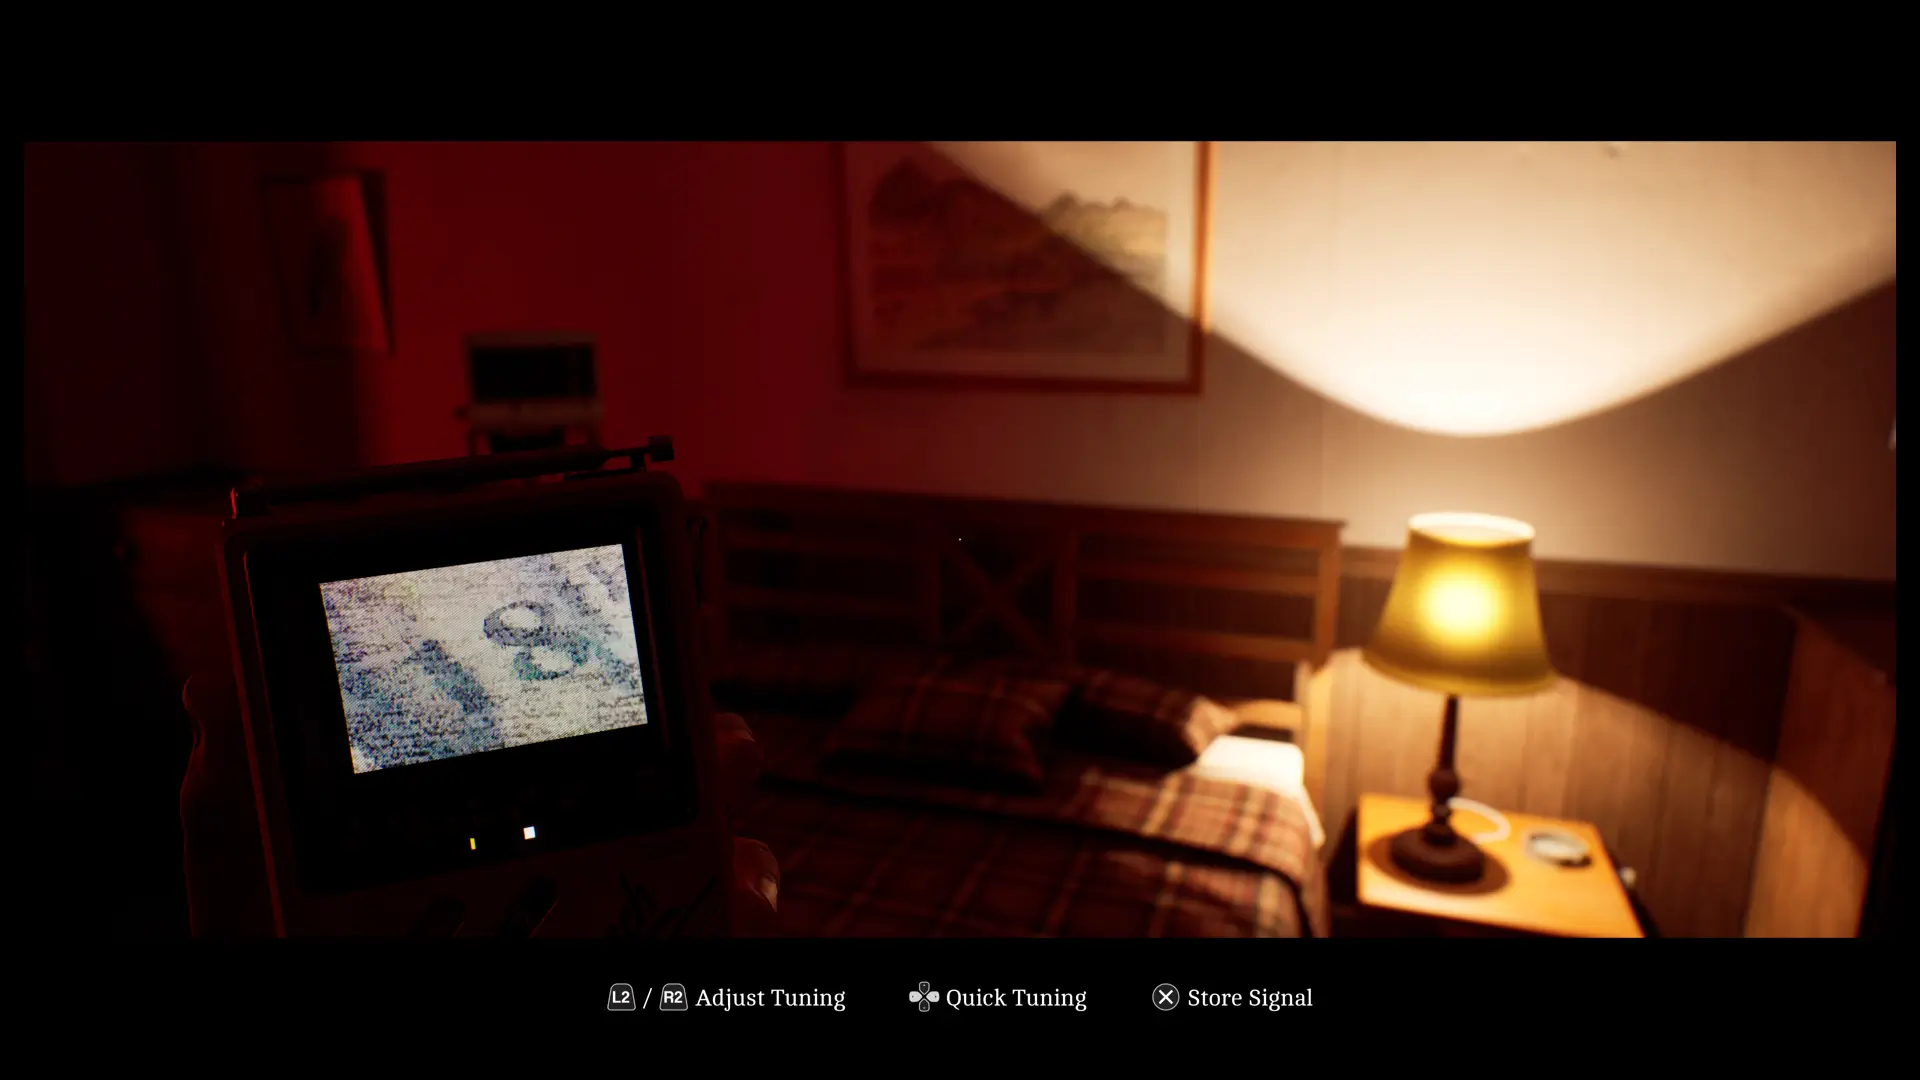
The codes here are the ones Alexandru Popescu entered into each keypad and console on PS5 for Map Master, and you can reach every Silent Hill Townfall guide and map from the same page. Ten Key Items only appear in New Game Plus, and they lead to the Dog and Sci-fi endings rather than the story.
Shorefront Key Item Solutions in Silent Hill Townfall: Zoe’s House, the Pharmacy, and the Scales
Zoe’s house comes first, and Simon needs light before power. Combine the Flashlight (No Batteries) from the kitchen with the AA Batteries upstairs, then add credit at the Power Box with the Prepaid Power Card from Peters Newsagent and flip its switch. The complete Shorefront District South map for Silent Hill Townfall puts the Organ Transplant Box on the kitchen table, where 956 opens the left lock and 133 the right.
The Clinic Scales take three items in a fixed order: the Broken Stethoscope from Jess’s bed on the left, the Prescription Dosage Error Note in the middle, and Zoe’s Lanyard on the right. The Pharmacy locker with the note opens with 6539, the poster order Channel 30 reveals among the CRTV Signal locations and channels. The full Shorefront District North map for Silent Hill Townfall covers the apartment building, where the photos print once the kitchen Printer is on.
St. Amelia Medical Centre Key Item Solutions in Silent Hill Townfall: Pumps, X-Rays, and the Intercom
The surgery needs three medicines at three pump rates: Hydroxalene 3mg from the Records Room kit goes in Pump #1 at 7, Dextracyclate 2.5mg from Bay 6 in Pump #2 at 15, and Tensobromide 11mg from the Pharmacy Store room in Pump #3 at 8. Confirm at the Console on the tray, and the detailed St. Amelia Medical Centre map for Silent Hill Townfall shows the Intubation Kit behind the Storage room squeeze-through.
The X-Ray Panel needs different settings for each scan. Align the skull on the X-Ray Computer, then set kV 3, mA 7, and Time 1, and for the chest set kV 7, mA 3, and Time 1.2 before collecting both from the printer. When Zoe takes the Intercom, respond at the monitors closest to 70/40, then 160, then 80, since the readings can vary slightly.
Silent Hill Townfall Blood Bag Puzzle: Every Medical Centre (Different) Key Item
Five named blood bags unlock the Different hospital’s doors. Alan Duncan’s opens the S.W. Door and Lesley Greer’s, from room S12, the D.P. Door, while Sarah Watson (S05), Matthew Clark, and George McEwan (P10) go into the machines by Patient Charts #1, #2, and #3 for the Transfusion Door. Matthew Clark’s bag only reaches room P03 after you press the Elevator Button in D02.
At the Blood Type Door, link T.F., H.M., and S.W. to the centre ring, then press ORDELL, since Simon’s wristband reads A+ and the plaque lists O-, O+, A-, and A+ as compatible. The Ward W Master Key is on the W04 workbench, the Ward P key comes with George McEwan’s bag, and the Silent Hill Townfall Medical Centre (Different) zone map puts Valves #1 and #2 in D05 and D10.
Clara Woods Estate Key Item Codes in Silent Hill Townfall: Lockers, Safes, and Tapes
Start at the CEG Employee Lockers Computer, which gives 772 for the Lost and Found locker and the South Brae House Key inside. In 5 South Brae, the nightstand Disk Case Key opens both disk cases, and the three black safes give up their Barcodes with 956, 736, and 129, each from a note among the Clue locations for every code.
Scan each Barcode for its locker: 184 for Locker 75, 575 for Locker 17, 971 for Locker 204, and 490 for Locker 94, with Locker 17 also giving the Boltcutters for four iron gates. Combine the three Mechanical Parts by joining the two discs first and the cylinder last, and remember the Upper Brae safe only opens once Tape: Today returns the house to the present.
Richard’s Key Items in Silent Hill Townfall: The Generator and the CEG HQ Projector
Richard’s stretch of Clara Woods starts at the yellow Security Booth Button. Next, set the Facilities Parking Generator’s rear levers so the left and middle are vertical and the right one diagonal, insert the Generator Key from the Manager’s Office, and pull the red lever. The Visitors Building Computer then works and gives you the “DONTREAD.DOC” Clue.
CEG HQ’s fifth-floor Projector needs the Bulb from the Media Department Storeroom and the Lens from the C.F.O. room drawer. Switch it on to free the CEG Maintenance Key, then load the Projector Slides from The Gallery in the order D, F, B, C, E, A for the CEO Access Card. The Silent Hill Townfall CEG HQ zone map also shows Security Room Computer #2, which prints an access card from ID 00007820518 once its printer is on.
SWDP (Different) Key Item Solutions in Silent Hill Townfall: Consoles, Valves, and Pipes
The first console takes the Controller Key, then A5D7 and E3E3 from the Reference Sheet. Turn the red handwheel valves left twice, once, twice, and twice on floors one to four, then press Gas Flow, Flow Test, and IGNITE. The Generator in room B34 powers the main-floor elevator, so switch it on before you need the lift.
The Remote Systems Control console runs the rest: VALVE 254 and FILTER 103 print the 0825 code for the AUX Key locker, then AUX LINE 246 and REGULATOR 592 follow the pipe puzzle, and 047, 621, and 793 open three loot rooms. The Silent Hill Townfall map of SWDP (Different) and the doors each Key Item unlocks show where every code leads.
Silent Hill Townfall New Game Plus Key Items for the Dog and Sci-fi Endings
The Dog ending needs three coins and three Guide Dogs Donation Boxes, all in New Game Plus. The Bronze Coin from the Video Star back room goes in the Main Street box, the Silver Coin from a Clara Woods courtyard shed in the Laundrette box, and the Gold Coin from SWDP room 793 in the box past the final Valve. The Dog and Sci-fi ending trophies list the rest.
The Sci-fi ending needs three Strange Books and the Strange Access Card. Examine the books in Zoe’s bedroom, the Stenhouse after Richard’s call, and SWDP room 621, then take the card from behind the hotel’s Sci-Fi Door and use it on the Sci-Fi Panel before Simon pulls out his IV. The door’s buttons follow the Strange Postcard locations, so collect those on your first run.
| Name | Map Location | Details | Found |
|---|---|---|---|
| Infusion Pump #1St. Amelia Medical CentreInfusion Pump #1 | St. Amelia Medical Centre | Found by the operating table in the surgery room, on the middle left side. After obtaining the medicine (Hydroxaline 3mg, Dextracyclate 2.5mg, and Tensobromide 11mg) scattered throughout the Medical Centre, interact with Infusion Pump #1, select Hydroxaline 3mg, press the "SET RATE" button, press 7, and press the "READY PUMP" button. After you finish with this Infusion Pump and the other two, don't forget to interact with the Console on the tray by the wall, on the left side of the operating table in the surgery room. Note: You get tips for this from the Medical Computer (Medication Dosage Table) and the Surgery Whiteboard in the surgery room. | |
| Infusion Pump #2St. Amelia Medical CentreInfusion Pump #2 | St. Amelia Medical Centre | Found by the operating table in the surgery room, on the bottom left side. After obtaining the medicine (Hydroxaline 3mg, Dextracyclate 2.5mg, and Tensobromide 11mg) scattered throughout the Medical Centre, interact with Infusion Pump #2, select Dextracyclate 2.5mg, press the "SET RATE" button, press 15, and press the "READY PUMP" button. After you finish with this Infusion Pump and the other two, don't forget to interact with the Console on the tray by the wall, on the left side of the operating table in the surgery room. Note: You get tips for this from the Medical Computer (Medication Dosage Table) and the Surgery Whiteboard in the surgery room. | |
| Infusion Pump #3St. Amelia Medical CentreInfusion Pump #3 | St. Amelia Medical Centre | Found by the operating table in the surgery room, on the top right side. After obtaining the medicine (Hydroxaline 3mg, Dextracyclate 2.5mg, and Tensobromide 11mg) scattered throughout the Medical Centre, interact with Infusion Pump #3, select Tensobromide 11mg, press the "SET RATE" button, press 8, and press the "READY PUMP" button. After you finish with this Infusion Pump and the other two, don't forget to interact with the Console on the tray by the wall, on the left side of the operating table in the surgery room. Note: You get tips for this from the Medical Computer (Medication Dosage Table) and the Surgery Whiteboard in the surgery room. | |
| ConsoleSt. Amelia Medical CentreConsole | St. Amelia Medical Centre | Found on a tray by the wall, on the left side of the operating table in the surgery room. After obtaining the medicine (Hydroxaline 3mg, Dextracyclate 2.5mg, and Tensobromide 11mg) scattered throughout the Medical Centre, interact with the three Infusion Pumps by the operating table and add the medicine. Then interact with the Console to progress the story. Note: You get tips for this whole process from the Medical Computer (Medication Dosage Table) and the Surgery Whiteboard in the surgery room. | |
| Medical Intubation KitSt. Amelia Medical CentreMedical Intubation Kit | St. Amelia Medical Centre | The Medical Intubation Kit is found on a shelf behind the Squeeze Through Spot in the Storage room. It is required for story progression. | |
| PatientSt. Amelia Medical CentrePatient | St. Amelia Medical Centre | The Patient is found on the operating table in the surgery room. You must intubate him after obtaining the Medical Intubation Kit. After interacting with the patient, move your PS5 controller until the red circle is shaking, then hold R2. You have to do this three times. | |
| Patient Chart #1Medical Centre - DifferentPatient Chart #1 | Medical Centre - Different | Found on the wall in the middle room of the Medical Centre - Different. Place the Sarah Watson Blood Bag in the transfusion machine next to Patient Chart #1 to open the Transfusion Door at the back of the room. | |
| Patient Chart #2Medical Centre - DifferentPatient Chart #2 | Medical Centre - Different | Found on the wall in the middle room of the Medical Centre - Different. Place the Matthew Clark Blood Bag in the transfusion machine next to Patient Chart #2 to open the Transfusion Door at the back of the room. | |
| Patient Chart #4Medical Centre - DifferentPatient Chart #4 | Medical Centre - Different | Found on the wall by the S.W. Door. | |
| Patient Chart #5Medical Centre - DifferentPatient Chart #5 | Medical Centre - Different | Found on the wall by the D.P. Door. | |
| Hydroxaline 3mgSt. Amelia Medical CentreHydroxaline 3mg | St. Amelia Medical Centre | The Hydroxaline 3mg is found inside the green first aid kit in the cabinet in the Records Room. Pick it up for story progression. | |
| Room 204 KeyShorefront District SouthRoom 204 Key | Shorefront District South | The key is found inside the bathroom of the hotel room, which Simon explores during his first visit to A Different Place. To collect it, you have to open the Bathroom Door by solving a small puzzle. Once you obtain it, use the key to exit Room 204. | |
| Alan Duncan Blood BagMedical Centre - DifferentAlan Duncan Blood Bag | Medical Centre - Different | Alan Duncan Blood Bag is found on the infusion stand by the bed. Use the Blood Bag to open the S.W. Door by placing it in the transfusion machine next to it. | |
| Sarah Watson Blood BagMedical Centre - DifferentSarah Watson Blood Bag | Medical Centre - Different | Sarah Watson Blood Bag is found on the infusion stand by the bed in the middle of room S05 on the S level. The Blood Bag is required to open the Transfusion Door. | |
| Ward W Master KeyMedical Centre - DifferentWard W Master Key | Medical Centre - Different | The Ward W Master Key is found on the workbench in room W04. You can use the key to open the locked doors on level W. | |
| Lesley Greer Blood BagMedical Centre - DifferentLesley Greer Blood Bag | Medical Centre - Different | Lesley Greer Blood Bag is found on the infusion stand by the bed in the middle of room S12 on the S level. Use the Blood Bag to open the D.P. Door by placing it in the transfusion machine next to it. | |
| Elevator ButtonMedical Centre - DifferentElevator Button | Medical Centre - Different | The Elevator Button is found in room D02. Press the button to drop the Matthew Clark Blood Bag to room P03 on the P level. | |
| George McEwan Blood BagMedical Centre - DifferentGeorge McEwan Blood Bag | Medical Centre - Different | George McEwan Blood Bag is found on the infusion stand by the bed in room P10 on the P level. The Blood Bag is required to open the Transfusion Door. | |
| Ward P Master KeyMedical Centre - DifferentWard P Master Key | Medical Centre - Different | The Ward P Master Key is obtained automatically after grabbing the George McEwan Blood Bag in room P10. You can use the key to open the locked doors on level P. | |
| Matthew Clark Blood BagMedical Centre - DifferentMatthew Clark Blood Bag | Medical Centre - Different | Matthew Clark Blood Bag is found in the elevator in room P03 on the P level, after pressing the Elevator Button in room D02 on the D level. The Blood Bag is required to open the Transfusion Door. | |
| Valve #1Medical Centre - DifferentValve #1 | Medical Centre - Different | The first Valve is found on the wall in room D05. Turn Valve #1 and Valve #2 to open the D Level Door by the ladder so you can get out of this area. | |
| Valve #2Medical Centre - DifferentValve #2 | Medical Centre - Different | The second Valve is found on the wall in room D10. Turn Valve #2 and Valve #1 to open the D Level Door by the ladder so you can get out of this area. | |
| Patient Chart #3Medical Centre - DifferentPatient Chart #3 | Medical Centre - Different | Found on the wall in the middle room of the Medical Centre - Different. Place the George McEwan Blood Bag in the transfusion machine next to Patient Chart #3 to open the Transfusion Door at the back of the room. | |
| Blood Type MechanismMedical Centre - DifferentBlood Type Mechanism | Medical Centre - Different | The Blood Type Mechanism is found on the Blood Type Door. You must use the Mechanism to open the door by filling the circle in the middle with the correct blood (compatible with Simon's, whose last name is Ordell). From Simon's wristband, you learn that his blood type is A+, and from the A+ Plaque in the room, you learn that A+ is compatible with O-, O+, A-, and A+. In the previous room, you can read the blood bags to see who has the compatible blood type. So you have: T.F., H.M., and S.W. So, spin the circles to link the mentioned initials to the circle in the middle, just like in our image. Finally, press the circle (ORDELL button) to open the door. | |
| Lock Box KeyClara Woods EstateLock Box Key | Clara Woods Estate | A Lock Box Key is found in the cash register on the front desk of the Post Service. You can use this key to open small metal lock boxes. | |
| CEG Employee Lockers ComputerClara Woods EstateCEG Employee Lockers Computer | Clara Woods Estate | The CEG Employee Lockers Computer is found on the front desk in the building. Use the Computer to obtain the "CEG Employee Locker List" and the "Lost and Found" Clues. | |
| South Brae House KeyClara Woods EstateSouth Brae House Key | Clara Woods Estate | The South Brae House Key is found in the Lost and Found Locker after unlocking it using the code (772) that you can get from the CEG Employee Lockers Computer. Use the key to open the South Braes 5 Front Door. | |
| Barcode ScannerClara Woods EstateBarcode Scanner | Clara Woods Estate | The Barcode Scanner is found on the counter by the wall. Use the Scanner to scan barcodes and unlock their linked lockers:
| |
| Barcode (CEG Lockers)Clara Woods EstateBarcode (CEG Lockers) | Clara Woods Estate | The Barcode (CEG Lockers) is found next to the Barcode Scanner. Use it on the Barcode Scanner to obtain the code (184) for Locker 75 in the CEG Employee Lockers building. | |
| "Fix-A-Disk!" SoftwareClara Woods Estate"Fix-A-Disk!" Software | Clara Woods Estate | The "Fix-A-Disk!" Software is found in the Disk Case on a shelf in the Atlas Computers building's back room. The Disk Case can be opened with the Disk Case Key. | |
| Grouped Floppy DisksClara Woods EstateGrouped Floppy Disks | Clara Woods Estate | The Grouped Floppy Disks are found in the Disk Case on the table in the office room on the upper floor of the house. The Disk Case can be opened with the Disk Case Key. | |
| Barcode (South Brae)Clara Woods EstateBarcode (South Brae) | Clara Woods Estate | The Barcode (South Brae) is found inside the black safe on the table in the office room on the upper floor of the house. You can obtain the code (956) for the black safe from the Reciprocating Compressor clue. Use it on the Barcode Scanner to obtain the code (575) for Locker 17 in the CEG Employee Lockers building. | |
| 5 South Brae ComputerClara Woods Estate5 South Brae Computer | Clara Woods Estate | The Computer in 5 South Brae is found on the desk in the office room on the upper floor of the house. First, interact with the computer, turn it on, and press the button on the printer to turn it on as well. Then, insert the “Fix-A-Disk!” Software floppy disk into the drive between the printer and the computer, interact with the computer screen, and press "Begin" so it says “Insert a disk to scan.” Next, pull out the floppy disk, insert the Floppy Disk (2 of 3), interact with the computer, press the "Repair Volume" button, and pull the floppy disk out of the drive. Now, insert Floppy Disk (1 of 3), press "Confirm", switch to Floppy Disk (2 of 3), then Floppy Disk (3 of 3). Finally, use the computer to print "MANUAL.EML" and pick it up from the printer. | |
| Mechanical Part #1Clara Woods EstateMechanical Part #1 | Clara Woods Estate | A Mechanical Part is found in Locker 17, which you can unlock using the 575 code after scanning the Barcode (South Brae). This Mechanical Part, along with two others, can be used to open the Strange Gate. | |
| BoltcuttersClara Woods EstateBoltcutters | Clara Woods Estate | The Boltcutters are found in Locker 17, which you can unlock using the 575 code after scanning the Barcode (South Brae). They can be used to open some Iron Gates: | |
| Barcode (North Brae)Clara Woods EstateBarcode (North Brae) | Clara Woods Estate | The Barcode (North Brae) is found inside the black safe on the dressing table in one of the bedrooms on the upper floor of the house. You can obtain the code (736) for the black safe from the Lamenting Poem clue. Use it on the Barcode Scanner to obtain the code (971) for Locker 204 in the CEG Employee Lockers building. | |
| Mechanical Part #2Clara Woods EstateMechanical Part #2 | Clara Woods Estate | A Mechanical Part is found in Locker 204, which you can unlock using the 971 code after scanning the Barcode (North Brae). This Mechanical Part, along with two others, can be used to open the Strange Gate. | |
| Tape: YesterdayClara Woods EstateTape: Yesterday | Clara Woods Estate | The Tape: Yesterday is found in the bedroom with the Hiding Spot on the upper floor of the 5 Upper Brae house. Look for it in the black case on the small table. Play the Tape in the Tape Player to change the time and find out new information. | |
| Tape: TodayClara Woods EstateTape: Today | Clara Woods Estate | The Tape: Today is found in the office room on the upper floor of the 5 Upper Brae house. Look for it in the Tape Player on the desk. Play the Tape in the Tape Player to change the time and find out new information. | |
| 5 Upper Brae ComputerClara Woods Estate5 Upper Brae Computer | Clara Woods Estate | The 5 Upper Brae Computer is found on the desk in the office room on the upper floor of the house. Look for it on the desk after playing the Tape: Yesterday. | |
| Tape: TomorrowClara Woods EstateTape: Tomorrow | Clara Woods Estate | The Tape: Tomorrow is found in the living room on the ground floor of the house, after playing the Tape: Yesterday. Look for it on the small table between the two chairs, where the Phone was in the present. Play the Tape in the Tape Player to change the time and find out new information. | |
| Tape: Do Not PlayClara Woods EstateTape: Do Not Play | Clara Woods Estate | The Tape: Do Not Play is found in the kitchen on the ground floor of the house, after playing the Tape: Tomorrow. Look for it in the black case next to the sink on the counter. Play the Tape in the Tape Player to change the time and find out new information. | |
| Back Door KeyClara Woods EstateBack Door Key | Clara Woods Estate | The Back Door Key is found in the kitchen on the ground floor of the house. Look for it on the counter, between the sink and the door, after playing the Tape: Do Not Play. With the key, you can open the back door of the house in the present. | |
| Ammonite DiskClara Woods EstateAmmonite Disk | Clara Woods Estate | The Ammonite Disk is found on the small table in the open storage room after going through the 5 Upper Brae Back Door. The disk can be used on the 5 Upper Brae Computer after playing the Tape: Yesterday. | |
| Barcode (Upper Brae)Clara Woods EstateBarcode (Upper Brae) | Clara Woods Estate | The Barcode (Upper Brae) is found inside the black safe on the desk in the office room on the upper floor of the house. You can obtain the code (129) for the black safe from the Current Count clue. To unlock the black safe, make sure you are in the present by playing Tape: Today. Use it on the Barcode Scanner to obtain the code (490) for Locker 94 in the CEG Employee Lockers building. | |
| Tape PlayerClara Woods EstateTape Player | Clara Woods Estate | The Tape Player is found in the office room on the upper floor of the 5 Upper Brae house. Look for it on the desk with the black safe. The Tape Player can actually change time by inserting tapes into it in order to obtain the code clues for the black safe. Follow these steps:
| |
| Disk Case KeyClara Woods EstateDisk Case Key | Clara Woods Estate | The Disk Case Key is found in the drawer of the nightstand in one of the bedrooms on the upper floor of the 5 South Brae house. The key unlocks: | |
| Mechanical Part #3Clara Woods EstateMechanical Part #3 | Clara Woods Estate | A Mechanical Part is found in Locker 94, which you can unlock using the 490 code after scanning the Barcode (Upper Brae). This Mechanical Part, along with two others, can be used to open the Strange Gate. | |
| Constructed Mechanical DeviceClara Woods EstateConstructed Mechanical Device | Clara Woods Estate | The Constructed Mechanical Device is obtained by combining the three Mechanical Parts: Note: First, combine the two discs, then follow with the cylindrical piece. | |
| Security Room Computer #1CEG HQSecurity Room Computer #1 | CEG HQ | Security Room Computer #1 is found on the large desk in the corner of the Security Room. Use the computer to obtain the "CEG Security: Out of Hours Access" and "Urgent Message" documents. | |
| Security Room Computer #2CEG HQSecurity Room Computer #2 | CEG HQ | Security Room Computer #2 is located on the small desk in the corner of the Security Room. Use the computer to obtain the Printed Access Card, but make sure you turn on the printer next to the computer first. To print the access card, you need the ID: 00007820518, obtained from the Employee File Cover Note. | |
| Printed Access CardCEG HQPrinted Access Card | CEG HQ | The Printed Access Card can be collected from the printer on the small desk in the Security Room after using Security Room Computer #2 and inputting the ID: 00007820518, obtained from the Employee File Cover Note. | |
| Security Booth ButtonClara Woods EstateSecurity Booth Button | Clara Woods Estate | Press the button in the yellow security booth to open the locked gate next to it while playing as Richard. | |
| Facilities Parking GeneratorClara Woods EstateFacilities Parking Generator | Clara Woods Estate | The Facilities Parking Generator is found in the fenced area on the east side of the Facilities Parking. To turn on the generator, you must first go behind it and turn the lever to the right (so the left and middle levers are vertical, and the right one is diagonal), then put the Generator Key from the Manager's Office in the front panel, and finally pull the red lever to the left (also on the front panel). | |
| Generator KeyClara Woods EstateGenerator Key | Clara Woods Estate | The Generator Key is found inside the Manager's Office on the upper floor of the Facilities Outbuilding. Look for it in the wall cabinet by the door. You need this key to get the Facilities Parking Generator to work. | |
| Visitors Building ComputerClara Woods EstateVisitors Building Computer | Clara Woods Estate | The Visitors Building Computer is found on the desk in the corner of the office room to the right after entering the building. Use the computer after turning on the Facilities Parking Generator to obtain the "Facilities: Works Halted" document and the Facilities: "DONTREAD.DOC" clue. | |
| ProjectorCEG HQProjector | CEG HQ | The Projector is found in the middle of the boardroom on the fifth floor. To get the Projector working, you require the following: After obtaining the Bulb and the Lens, put them in the projector and press the "ON" switch so you can pick up the CEG Maintenance Key from the hand of a corpse at the table. Only then can you go get the Projector Slides. The Projector Slides must be inserted in the following order (as hinted on the Meeting Agenda):
| |
| Access Card - Level 3/4CEG HQAccess Card - Level 3/4 | CEG HQ | The Access Card - Level 3/4 is found next to the phone on the large table in the boardroom on the fifth floor. The Access Card unlocks:
| |
| Public Relations ComputerCEG HQPublic Relations Computer | CEG HQ | The Public Relations Computer is found inside an office in Public Relations on the third floor of CEG HQ. Look for it on the desk with the corpse. Use the computer to obtain the "CEG Tower: Evening News" and "CEG Tower: Engineer Public Statement" documents. | |
| CEG Storeroom KeyCEG HQCEG Storeroom Key | CEG HQ | The CEG Storeroom Key is found inside the Media Department on the fourth floor. Look for it next to a corpse in the side office. | |
| Projector BulbCEG HQProjector Bulb | CEG HQ | The Projector Bulb is found in the "General Storage" cabinet in the Media Department Storeroom on the fourth floor of the CEG HQ. This item is required to repair the Projector in the Boardroom on the fifth floor. | |
| Projector LensCEG HQProjector Lens | CEG HQ | The Projector Lens is found inside a desk drawer in the Finance C.F.O. room on the third floor of the CEG HQ. This item is required to repair the Projector in the Boardroom on the fifth floor. | |
| CEG Maintenance KeyCEG HQCEG Maintenance Key | CEG HQ | The CEG Maintenance Key is found in the hand of a corpse at the table after obtaining the Projector Bulb and the Projector Lens, putting them in the projector, and pressing the "ON" switch. Use the key to open the Maintenance Doors on all floors. | |
| Projector SlidesCEG HQProjector Slides | CEG HQ | The Projector Slides are found on the table in "The Gallery" Meeting Space room on the mezzanine floor. This item is required for the Projector in the Boardroom on the fifth floor. | |
| CEO Access CardCEG HQCEO Access Card | CEG HQ | The CEO Access Card is obtained after playing the Projector Slides in the correct order in the CEG HQ - Fifth Floor Boardroom. | |
| Hotel Room Bathroom Door CombinationShorefront District SouthHotel Room Bathroom Door Combination | Shorefront District South | The Hotel Room Bathroom Door Combination consists of two parts. The first one is obtained using Simon's CRTV scanner, as explained in the tutorial. Once you track the signal, you should be able to see the first part of a date: January 18. Use it alongside the Room Service Card Clue in the room to open the Bathroom Door. | |
| 10th Floor ComputerCEG HQ10th Floor Computer | CEG HQ | The 10th Floor Computer is found on the desk outside of the CEO's Office on the CEG HQ - 10th Floor. | |
| Flashlight (No Batteries)Shorefront District SouthFlashlight (No Batteries) | Shorefront District South | Found inside the drawer above the washing machines in Zoe's kitchen on the ground floor. It can be obtained while playing as Simon during the first playthrough. | |
| AA BatteriesShorefront District SouthAA Batteries | Shorefront District South | The AA Batteries are in Zoe's house, in the small bedroom on the left side of the corridor on the second floor. Look for them in the drawer of the cabinet at the back of the room. Combine them with the flashlight from the kitchen to get a functional flashlight. They can be obtained while playing as Simon during the first playthrough. | |
| Controller KeySWDP - DifferentController Key | SWDP - Different | Found inside the small iron case by the handwheel valve on the second floor. You can reach the second floor using the elevator next to the light. The key is required to operate the console on the first floor. | |
| ConsoleSWDP - DifferentConsole | SWDP - Different | The Console is found in the room you reach after climbing the stairs in the starting area. Operate the console following these steps:
Now you can progress by crouching through the hole in the corner of the room. | |
| Zoe's ComputerShorefront District SouthZoe's Computer | Shorefront District South | The Computer in Zoe's House is a key item that progresses the story. It is located in the corner of the living room on the ground floor. Before you can open the computer, you must turn on the Power Box in the small storage space on the ground floor. | |
| Organ Transplant BoxShorefront District SouthOrgan Transplant Box | Shorefront District South | The Organ Transplant Box in Zoe's House is a key item that progresses the story. It is located on the table in the kitchen on the ground floor. To open the box, you must enter the correct code after obtaining the Organ Transplant Card and the For Attending email clues:
| |
| ValveSWDP - DifferentValve | SWDP - Different | Found in the middle of the main floor. Can be turned to progress the story after using the Clamp Controls. | |
| Prepaid Power CardShorefront District SouthPrepaid Power Card | Shorefront District South | The Prepaid Power Card is a key item found inside the cash register, on the counter inside the Peters Newsagent building. It is required for the Power Box inside Zoe's House. It can be obtained while playing as Simon during the first playthrough. | |
| Power BoxShorefront District SouthPower Box | Shorefront District South | The Power Box in Zoe's House is a key item that progresses the story. It is located in the small storage space on the ground floor. After you get a functional flashlight for Simon, open the small door and head inside to find it. You can turn the Power Box on after obtaining the Power Card Credit Guide next to it and the Prepaid Power Card inside the Peters Newsagent building. Interact with the Power Box, insert the Power Card in the slot, use the A button to select Card Credit, press the B button to apply credit, and flip the on switch in the bottom right corner. | |
| Zoe’s LanyardShorefront District SouthZoe’s Lanyard | Shorefront District South | Zoe’s Lanyard is obtained automatically after opening the Organ Transplant Box on the table in the kitchen on the ground floor. It can be obtained while playing as Simon during the first playthrough. | |
| Clinic ComputerShorefront District SouthClinic Computer | Shorefront District South | The Computer in the Clinic is a key item that progresses the story. It is located on the desk in the second room at the end of the corridor. | |
| Prescription Dosage Error NoteShorefront District SouthPrescription Dosage Error Note | Shorefront District South | The Prescription Dosage Error Note in the Pharmacy is a key item that progresses the story. It is located in the locked locker in the back room of the Pharmacy. It can be obtained while playing as Simon during the first playthrough. To open the locker, you must enter the correct code (6539) you can learn by inspecting the posters in the Pharmacy in the order shown on the CRTV Channel 30. | |
| Lock Box KeySWDP - DifferentLock Box Key | SWDP - Different | A Lock Box Key is found on the counter in the room on the southwestern side of the upper floor. | |
| GeneratorSWDP - DifferentGenerator | SWDP - Different | The Generator is found inside room B34 on the lower floor. Use the lever on the Generator to turn the power on so you can use the elevator on the main floor. | |
| 21 Farrow St. – Back Door KeyShorefront District South21 Farrow St. – Back Door Key | Shorefront District South | The 21 Farrow St. – Back Door Key is found on the table by the window in the living room of Apartment 1/2, on the upper floor of Apartment Building 16. You can use it to open Jess's House Back Door. It can be obtained while playing as Simon during the first playthrough. | |
| Broken StethoscopeShorefront District SouthBroken Stethoscope | Shorefront District South | The Broken Stethoscope is found on the bed in the bedroom of Jess's house. It can be obtained while playing as Simon during the first playthrough. | |
| ScalesShorefront District SouthScales | Shorefront District South | Three Scales are found in the second room at the end of the corridor, inside the Clinic. Look for them on the stack of boxes. You must put the following items on the scales to progress the story:
| |
| First Floor ComputerSWDP - DifferentFirst Floor Computer | SWDP - Different | The First Floor Computer is found in the northeastern corner. Interact with the computer to obtain the "SWDP: Ordell Site Visit" document. | |
| JOE KeySWDP - DifferentJOE Key | SWDP - Different | The JOE Key is found on one of the tables in the room in the northeastern corner of the first floor. The key unlocks the JOE Door #2. | |
| Access CardSWDP - DifferentAccess Card | SWDP - Different | The Access Card is found on the metal workbench in the JOE Room on the southeastern side of the first floor. The Access Card unlocks the Upper Floor Shutter Door. | |
| AUX KeySWDP - DifferentAUX Key | SWDP - Different | The AUX key is found inside the rusted locker in the Control Room on the upper floor. The code (0825) for the locker is obtained by using the Remote Systems Control console on the eastern side of the Control Room. Use the AUX key to open the AUX Door in the northwestern corner of the first floor. | |
| AUX DiskSWDP - DifferentAUX Disk | SWDP - Different | The AUX Disk is found inside the cabinet in the AUX room in the northwestern corner of the first floor. Take the disk and put it into the computer in the same room. | |
| AUX Room ComputerSWDP - DifferentAUX Room Computer | SWDP - Different | The AUX Room Computer is found on the metal workbench in the AUX Room on the first floor. Insert the AUX Disk located in the same room into the Computer to obtain the Auxiliary Lines clue. | |
| PipesSWDP - DifferentPipes | SWDP - Different | Found on the walls of the AUX room on the first floor. Based on the Auxiliary Lines clue obtained from the computer in the same room, you must turn the correct lever valves:
| |
| Mr. Stewart's KeyShorefront District NorthMr. Stewart's Key | Shorefront District North | Mr. Stewart's Key is found next to the hot tub in Mr. Stewart's bathroom. You can grab it after seeing the monster, but make sure you lock the door behind you. You require the key to open Mr. Stewart's House Back Door and escape the house. | |
| Lock Box KeySWDP - DifferentLock Box Key | SWDP - Different | A Lock Box Key is found on the counter in room 047 on the northern side of the lower floor. | |
| Valve FSWDP - DifferentValve F | SWDP - Different | Valve F is found in the back of room 592, and it can be turned after using the Remote Systems Control console. After turning Valve F, carefully make your way back to the control room on the upper floor and get the Clamp Release Procedure. | |
| Clamp ControlsSWDP - DifferentClamp Controls | SWDP - Different | The Clamp Controls console is found on the western side of the Control Room on the upper floor in SWDP - Different. The console can be used to proceed with the story by following these steps (all information is from the Clamp Release Procedure):
Note: The order in which you complete the steps doesn't matter, but make sure everything is set correctly. | |
| Remote Systems ControlSWDP - DifferentRemote Systems Control | SWDP - Different | The Remote Systems Control console is found on the eastern side of the Control Room on the upper floor in SWDP - Different. The console can be used to open a bunch of doors by following these steps:
| |
| Bronze CoinShorefront District SouthBronze Coin | Shorefront District South | The Bronze Coin is found inside the Video Star store on the western edge of West Shore Road. Look for it on a shelf in the small back room. Put the Bronze Coin inside the Guide Dogs Donation Box on Main Street for the “Dog” ending. Note: The Bronze Coin can be obtained only in New Game Plus. | |
| Guide Dogs Donation BoxShorefront District SouthGuide Dogs Donation Box | Shorefront District South | The Guide Dogs Donation Box is found in front of a building on the left side of Main Street, just before the Pharmacy. Put the Bronze Coin in the Guide Dogs Donation Box for the “Dog” ending. Note: The Guide Dogs Donation Box can be interacted with only in New Game Plus. | |
| Strange Book 1Shorefront District SouthStrange Book 1 | Shorefront District South | Strange Book 1 is found inside the bedroom of Zoe's House. Look for it under the left bedside cabinet, and examine it for the “Sci-fi” Ending. The book says: “History of Space Flight, 1952 – 1992”. Note: You can examine the book only in New Game Plus. | |
| Strange Access CardShorefront District SouthStrange Access Card | Shorefront District South | The Strange Access Card is found next to the elephant on the drawer cabinet in the corner of the room behind the Sci-Fi Door. Note: The Strange Access Card can be obtained only during New Game Plus, and it is required for the “Sci-fi” Ending. | |
| Silver CoinClara Woods EstateSilver Coin | Clara Woods Estate | The Silver Coin is found on a shelf in a shed by going to the right at the end of the street with the many corpses. Then, when you reach the blockade, go into the alley to the right, go through the wooden door, go through another wooden door, and you'll find the shed in the corner of the courtyard. Put the Silver Coin inside the Guide Dogs Donation Box in the Laundrette building for the “Dog” ending. Note: The Silver Coin can be obtained only in New Game Plus. | |
| Strange Book 2Clara Woods EstateStrange Book 2 | Clara Woods Estate | Strange Book 2 is found inside the Stenhouse building after the phone call with Richard. Look for it on the bookshelf in the corner, and examine it for the “Sci-fi” Ending. The book says: “Freeze Me / Wake Me – Elias Fisher”. Note: You can examine the book only in New Game Plus. | |
| Guide Dogs Donation BoxClara Woods EstateGuide Dogs Donation Box | Clara Woods Estate | The Guide Dogs Donation Box is found in the Laundrette building, which you can enter after obtaining the Boltcutters. Put the Silver Coin in the Guide Dogs Donation Box for the “Dog” ending. Note: The Guide Dogs Donation Box can be interacted with only in New Game Plus. | |
| Gold CoinSWDP - DifferentGold Coin | SWDP - Different | The Gold Coin is found in room 793 on the lower floor in the SWDP - Different. Put the Gold Coin inside the Guide Dogs Donation Box for the “Dog” ending. Note: The Gold Coin can be obtained only in New Game Plus. | |
| Strange Book 3SWDP - DifferentStrange Book 3 | SWDP - Different | Strange Book 3 is found inside room 621 on the south side of the SWDP - Different lower floor. Look for it on the metal workbench in the back of the room. Examine it for the “Sci-fi” Ending. The book says: “A Map of Nowhere Else – The Future of Interstellar Travel”. Note: You can examine the book only in New Game Plus. | |
| Guide Dogs Donation BoxSWDP - DifferentGuide Dogs Donation Box | SWDP - Different | The Guide Dogs Donation Box is found after tuning the Valve, at the back of the corridor with the red lights. Put the Gold Coin in the Guide Dogs Donation Box for the “Dog” ending (last step). Note: The Guide Dogs Donation Box can be interacted with only in New Game Plus. | |
| Sci-Fi PanelSWDP - DifferentSci-Fi Panel | SWDP - Different | The Sci-Fi Panel is found next to the door after tuning the Valve and progressing through the red corridors. Before going through the door that triggers the scene where Simon pulls out his IV, interact with the Panel and use the Strange Access Card for the final step required for the “Sci-fi” Ending. | |
| Gate ButtonShorefront District NorthGate Button | Shorefront District North | The Gate Button is found on a desk in the garage, close to the Medical Centre Garage Phone. Press the button to open the gate outside so you can progress the story. | |
| Apartment Building ComputerShorefront District NorthApartment Building Computer | Shorefront District North | The Apartment Building Computer is found on a desk in a room on the third floor of the building. It can be used while playing as Simon in the Otherworld. Can be used to print the Photos after turning on the Printer in the kitchen. | |
| PrinterShorefront District NorthPrinter | Shorefront District North | Found on the table in the kitchen on the third floor of the apartment building. It can be used while playing as Simon in the Otherworld. First, turn on the Printer, then use the Computer to print the Photos, and return to the Printer to pick them up. | |
| Medical ComputerSt. Amelia Medical CentreMedical Computer | St. Amelia Medical Centre | Found on the counter in the surgery room. Power it up and read the documents for hints about the machines in the room. | |
| ProjectorSt. Amelia Medical CentreProjector | St. Amelia Medical Centre | Found on the wall in the Surgery room. Bring the Head and Chest X-Rays to the projector and examine them for Dr. Glenn. | |
| IntercomSt. Amelia Medical CentreIntercom | St. Amelia Medical Centre | Found on the wall in the Surgery room. Use it when you gain control of Zoe to proceed. After talking to Dr. Glenn, go to the monitor with Systolic (70) and Diastolic (40), then press "Respond" while hovering over them. The numbers may vary slightly, but you can pick the monitor closest to 70 and 40. Next, go to the monitor with Pulse (160), or the one closest to 160, and press "Respond" while hovering over it. Finally, go to the monitor with SpO2% (80), or the one closest to 80, and press "Respond" while hovering over it. | |
| Monitor #1St. Amelia Medical CentreMonitor #1 | St. Amelia Medical Centre | Found by the operating table in the surgery room, on the top left side. | |
| Monitor #2St. Amelia Medical CentreMonitor #2 | St. Amelia Medical Centre | Found by the operating table in the surgery room, on the middle bottom side. | |
| Monitor #3St. Amelia Medical CentreMonitor #3 | St. Amelia Medical Centre | Found by the operating table in the surgery room, on the bottom right side. | |
| Monitor #4St. Amelia Medical CentreMonitor #4 | St. Amelia Medical Centre | Found by the operating table in the surgery room, on the middle right side. | |
| Monitor #5St. Amelia Medical CentreMonitor #5 | St. Amelia Medical Centre | Found by the operating table in the surgery room, on the top right side. | |
| X-Ray ComputerSt. Amelia Medical CentreX-Ray Computer | St. Amelia Medical Centre | Found on the desk in the X-Ray room. Must be used to take X-Rays of the patient's skull and chest in the Surgery room. Start with the skull and use the controls to move the camera (including zooming) until the “Patient Skull - Aligned” text is displayed on the monitor. Next, use the X-Ray panel by the door to continue. Once you are done with the skull (including the part with the panel by the door), do the same but with the chest. | |
| X-Ray PanelSt. Amelia Medical CentreX-Ray Panel | St. Amelia Medical Centre | Found by the door in the X-Ray room. Must be used to take X-Rays of the patient's skull and chest in the Surgery room. After using the X-Ray Computer to align the camera with the skull, follow these steps (you get instructions for this from the Medical Computer in the Surgery room, in the “X-Ray Dosage Table” document):
After using the X-Ray Computer to align the camera with the chest, follow these steps (you also get instructions for this from the Medical Computer in the Surgery room, in the “X-Ray Dosage Table” document):
Now you can pick up the X-Rays from the printer on the counter in the corner of the same room. | |
| Head and Chest X-RaysSt. Amelia Medical CentreHead and Chest X-Rays | St. Amelia Medical Centre | Found in the printer on the counter in the corner of the X-Ray room, after using the X-Ray Computer and the X-Ray Panel in the same room. Take the X-Rays to the Projector in the Surgery room to progress the story. | |
| Tensobromide 11mgSt. Amelia Medical CentreTensobromide 11mg | St. Amelia Medical Centre | The Tensobromide 11mg is found inside the green first aid kit in the Pharmacy Store room. Pick it up for story progression. | |
| First Floor Chapman Ward ComputerSt. Amelia Medical CentreFirst Floor Chapman Ward Computer | St. Amelia Medical Centre | The First Floor Chapman Ward Computer is found behind the large desk on the upper floor of the St. Amelia Medical Centre. Use the computer to obtain a Document and a Clue. | |
| Dextracyclate 2.5mgSt. Amelia Medical CentreDextracyclate 2.5mg | St. Amelia Medical Centre | The Dextracyclate 2.5mg is found in the medical equipment in Bay 6 on the upper floor. Pick it up for story progression. |

© MapMaster.io 2024. All rights reserved.